Greystone RV Stove Manual: A Comprehensive Guide
Greystone offers diverse RV cooking solutions, from 3-burner cooktops (part GR26GR) to 950W ovens․ This manual details operation, safety, and maintenance for optimal performance․
Greystone RV stoves are designed for the unique demands of mobile living, offering reliable cooking solutions for any adventure․ From compact models like the Greystone 17 & 21 gas ranges, ideal for smaller kitchens, to larger units completing the look of any RV kitchen, Greystone caters to diverse needs․
These ranges feature robust construction and efficient 8,000 BTU burners, ensuring spacious cooking capabilities․ Greystone also provides over-the-range ovens (950 Watts, 30×16) and freestanding propane ranges (part number GR26GR), prioritizing both functionality and style within the RV environment․
Understanding Your Model Number
Your Greystone RV stove’s model number is crucial for identifying specific parts, accessing the correct manual, and ensuring compatibility when ordering replacements․ Common Greystone part numbers include GR26GR, 2022302064, and 2022302068․
Locate this number on the appliance’s data plate, typically found inside the oven compartment or on the back of the stove․ Knowing your model number streamlines troubleshooting and guarantees you receive the precise components needed for maintenance or repair․ It also helps Greystone support provide tailored assistance․
Locating the Manual Online
While a physical manual may accompany your Greystone RV stove, accessing it online offers convenience and ensures you have the latest version․ Begin by visiting the official Greystone website or searching for your specific model number (e․g․, 2022302064, GR26GR) on search engines․
Many RV parts retailers and online forums also host downloadable manuals․ Ensure the document corresponds to your exact model for accurate operating instructions and safety guidelines․ Digital access allows for easy reference during travel and eliminates the risk of losing a paper copy․
Safety Precautions
Prioritize safety when operating your Greystone RV stove․ Always ensure adequate ventilation to prevent carbon monoxide buildup, especially when using propane․ Never leave a lit burner unattended․ Keep flammable materials clear of the cooktop and oven․
Avoid using abrasive cleaners like steel wool or rust removers, as they can damage surfaces․ Do not obstruct ventilation openings․ Regularly inspect the propane regulator and connections for leaks․ Familiarize yourself with emergency procedures and keep a fire extinguisher readily accessible within the RV․
General Safety Guidelines
When using your Greystone RV stove, maintain a clear and clutter-free cooking area․ Never allow children to operate the stove unsupervised․ Always use properly fitting cookware․ Exercise caution when handling hot surfaces, utilizing pot holders or oven mitts․
Ensure the stove is level to prevent spills and uneven heating․ Regularly inspect the stove for any signs of damage or wear․ If you smell gas, immediately shut off the propane supply and ventilate the RV․ Prioritize a safe cooking environment for enjoyable meal preparation․
Propane Safety Information
Greystone RV stoves utilize propane; therefore, strict safety measures are crucial․ Regularly check propane connections for leaks using a soapy water solution – never a flame․ Ensure adequate ventilation when operating the stove to prevent carbon monoxide buildup․ Store propane tanks securely outdoors, away from direct sunlight and heat sources․
Never attempt to repair propane components yourself; contact a qualified technician․ If you smell gas, immediately extinguish all flames, shut off the propane supply, and evacuate the RV․ Proper propane handling ensures safe and reliable stove operation․
Components of a Greystone RV Stove
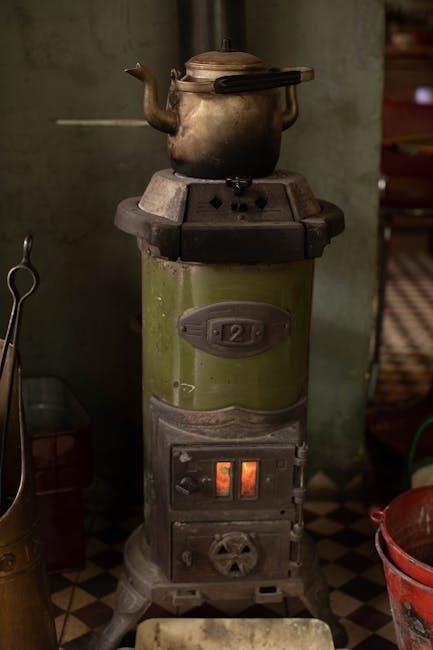
Greystone RV stoves feature several key components․ The cooktop includes burners delivering up to 8,000 BTUs for efficient cooking․ The oven, available in models like the 950W over-the-range version, provides baking and roasting capabilities․ A control panel manages burner ignition and oven temperature settings․
Essential parts include burner grates for stable cookware support and a propane regulator ensuring consistent gas flow․ Specific models, such as the 17 & 21 ranges, are designed for durability and kitchen integration․

Cooktop Burners
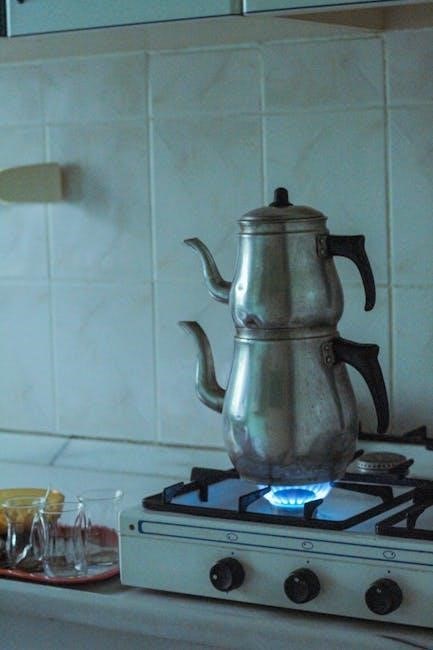
Greystone RV cooktop burners are designed for reliable performance, offering high-output cooking with up to 8,000 BTUs․ These burners provide consistent flame control for simmering or rapid boiling․ Proper operation involves ensuring burners are clean and unobstructed for optimal ignition and efficiency․
Burner grates offer stable support for cookware․ Regular cleaning of both burners and grates is crucial for maintaining performance and preventing issues․ Always refer to the safety precautions regarding propane use when operating the cooktop burners․
Oven Features
Greystone RV ovens, including the 950-watt over-the-range model (30×16), are designed for convenient cooking in your recreational vehicle․ These ovens feature adjustable temperature settings for baking and roasting, providing versatility for various recipes․ The interior is built for efficient heat distribution, ensuring even cooking results․
Some models may include features like convection cooking for faster, more uniform heating․ Always adhere to safety guidelines when using the oven, and avoid harsh cleaning agents that could damage the interior surfaces․
Control Panel Overview
The Greystone RV stove control panel typically features separate controls for the cooktop burners and the oven․ Burner knobs allow for precise flame adjustment, ranging from low simmer to high heat․ The oven control knob enables temperature selection, often with markings for common baking and roasting temperatures․
Depending on the model, you may find an oven timer or indicator light․ Familiarize yourself with the location and function of each control before operation․ Refer to the specific model’s diagram for detailed identification of each component․
Operating Instructions: Cooktop
To operate the Greystone RV cooktop, ensure the propane supply is connected and the tank is open․ Select the desired burner and firmly press and turn the control knob to the “Ignite” position․ You should hear a clicking sound, indicating the igniter is working․ Continue holding the knob for a few seconds after ignition․
If the burner doesn’t ignite, repeat the process․ Once lit, adjust the flame using the control knob to achieve the desired cooking temperature․ Always supervise the cooktop while in use and never leave it unattended․
Igniting the Burners
Before attempting ignition, verify the propane tank is full and the valve is open․ Select the burner you wish to use and firmly press down on the control knob․ Simultaneously, rotate the knob to the “Ignite” position․ This activates the electronic igniter, producing a clicking sound․ Continue holding the knob down for approximately five to ten seconds after hearing the click․
If ignition doesn’t occur, release the knob and repeat the process․ Ensure no obstructions are present near the burner ports․ If issues persist, consult the troubleshooting section․
Adjusting Flame Control
Once a burner is ignited, you can adjust the flame height by rotating the control knob․ Turning the knob clockwise increases the flame, providing more heat for faster cooking․ Rotating it counterclockwise decreases the flame, offering lower heat for simmering or warming․ Observe the flame carefully to achieve your desired cooking temperature․
Avoid using excessively high flames, as this can cause scorching and waste propane․ Start with a lower flame and gradually increase it as needed․ Ensure stable and even flame distribution for optimal cooking results․
Operating Instructions: Oven
The Greystone RV oven provides efficient baking and roasting capabilities․ Before operation, ensure the oven is free of obstructions and the door seals properly․ To begin, rotate the temperature control knob to the desired setting․ Allow the oven to preheat fully before placing food inside – typically 10-15 minutes․

Monitor cooking progress through the oven window․ Avoid opening the door frequently during baking, as this can lower the temperature and affect cooking times․ Always use oven mitts when handling hot cookware․
Setting Oven Temperature
To accurately set the oven temperature, rotate the control knob to the desired degree marking․ Greystone RV ovens typically range from 200°F to 350°F, suitable for various cooking needs․ Note that actual oven temperature may slightly vary․ For optimal baking results, use an oven thermometer to verify internal temperature․
Start with the recommended temperature in your recipe and adjust as needed․ Avoid exceeding the maximum temperature to prevent damage or fire hazards․ Always allow sufficient preheating time before placing food inside for even cooking․
Baking and Roasting
When baking or roasting in your Greystone RV oven, ensure proper ventilation by slightly opening a nearby window․ Position oven racks to accommodate your cookware, allowing for even heat circulation․ For baking, use appropriate bakeware like pans or sheets․ Roasting benefits from a rack within a roasting pan․
Monitor cooking progress regularly, as RV ovens may cook faster․ Adjust temperature or cooking time as needed․ Always use oven mitts when handling hot cookware․ Remember to turn off the oven when finished and allow it to cool completely before cleaning․
Cleaning and Maintenance
Regular cleaning extends the life of your Greystone RV stove․ After each use, wipe down the cooktop with a damp cloth and mild detergent․ Avoid abrasive cleaners like steel wool, bleach, or rust removers, as these can damage surfaces․ Burner grates should be removed and washed separately․ The oven requires periodic cleaning; avoid harsh oven cleaners․
For baked-on residue, a paste of baking soda and water can be effective․ Always ensure all components are completely dry before reassembly․ Proper maintenance ensures safe and efficient operation․
Cooktop Cleaning Procedures
Maintaining a clean cooktop is crucial for optimal performance and safety․ After each use, allow the cooktop to cool completely before cleaning․ Wipe up spills immediately with a damp, non-abrasive cloth․ For stubborn residue, create a paste using baking soda and water, applying gently to avoid scratching․
Do NOT use oven cleaners, bleach, or steel wool, as these can cause permanent damage․ Rinse thoroughly with clean water and dry with a soft towel․ Regularly clean burner bases to prevent clogging․
Oven Cleaning Procedures
Regular oven cleaning ensures efficient baking and prevents unpleasant odors․ Allow the oven to cool completely before beginning․ Remove racks and wash them separately with warm, soapy water․ For light cleaning, wipe interior surfaces with a damp cloth and mild detergent․
Do NOT use oven cleaners, bleach, or abrasive materials, as they can damage the oven’s interior․ For baked-on residue, create a paste of baking soda and water, apply, and let sit before wiping clean․ Rinse thoroughly and dry․
Burner Grate Cleaning
Maintaining clean burner grates is crucial for even heat distribution and efficient cooking․ Allow grates to cool completely before handling․ Remove grates and soak them in warm, soapy water for approximately 15-30 minutes to loosen food particles․
Use a non-abrasive brush or sponge to scrub away remaining residue․ Do NOT use steel wool or harsh chemicals, as these can damage the grate’s finish․ Rinse thoroughly with clean water and dry completely before replacing them on the cooktop․
Troubleshooting Common Issues
Encountering issues with your Greystone RV stove? A burner failing to ignite could stem from a blocked port – carefully clean around the burner head․ If the oven isn’t heating, verify the propane supply and regulator function․ Ensure the igniter is clicking; a weak click suggests a low battery․
For persistent problems, consult the full manual or Greystone support․ Always prioritize safety; if you smell gas, immediately shut off the supply and ventilate the RV․ Never attempt repairs you’re uncomfortable with․
Burner Won’t Ignite
If a burner fails to ignite, first ensure the propane tank is full and the valve is open․ Check for obstructions around the burner port – food debris or spills can block gas flow․ Clean the burner head carefully with a small brush or wire․ Verify the igniter is sparking; a weak or absent spark indicates a potential issue with the igniter itself or its wiring․
Try relighting multiple times․ If it still doesn’t ignite, consult the manual for specific troubleshooting steps or contact Greystone support for assistance․
Oven Not Heating
If the oven isn’t heating, confirm the oven is properly set to a temperature and the timer (if applicable) is engaged․ Check the propane supply – a low tank or closed valve will prevent heating․ Inspect the oven’s igniter; a faulty igniter won’t initiate the heating process․ Ensure the oven’s safety shut-off hasn’t been triggered, which can occur with excessive tilt during travel․
If issues persist, consult the manual or contact Greystone support for professional guidance․
Greystone RV Stove Parts & Replacements
Maintaining your Greystone stove often requires replacing worn components․ Common parts like burner grates, knobs, and igniters are frequently needed․ Identifying the correct part number is crucial; examples include GR26GR, 2022302064, and 2022302068․ Online retailers and RV parts suppliers stock Greystone-specific replacements․
When ordering, verify compatibility with your specific model․ Universal parts may not always fit correctly․ Always prioritize genuine Greystone parts for optimal performance and safety․
Finding Replacement Parts
Locating Greystone RV stove replacement parts involves several avenues․ Online RV parts retailers are a convenient starting point, often allowing searches by model number or part description․ Conejo RV and Nomadic Supply Company are potential sources․ Checking directly with Greystone support can also yield accurate part numbers and availability․
When searching, having your stove’s model number (e․g․, 2022302068) is essential․ Websites like eBay may offer used or discontinued parts, but verify seller reliability․ Ensure the part is compatible before purchasing․
Common Part Numbers (e․g․, GR26GR, 2022302064, 2022302068)
Several Greystone RV stove part numbers appear frequently in replacement requests․ GR26GR designates a stainless steel, 3-burner freestanding propane range․ 2022302064 is associated with larger Greystone ranges, weighing approximately 120 lbs․ Another common number, 2022302068, corresponds to specific range models, weighing around 62․9 pounds․
These numbers are crucial when ordering replacements․ Always double-check compatibility with your specific model․ Part numbers can vary slightly depending on the year of manufacture and specific features․ Refer to your stove’s documentation or contact Greystone support for verification․
Specific Greystone Models
Greystone offers a range of RV stoves tailored to different needs․ The Greystone 17 and 21 gas ranges are popular choices, designed for durability and adaptable kitchen layouts, boasting 8,000 BTU burners․ Additionally, Greystone manufactures Over-the-Range ovens, specifically a 950-watt model measuring 30×16 inches, maximizing space efficiency․
These models cater to varying RV sizes and cooking preferences․ Understanding your specific model number is vital for accessing the correct manual and replacement parts, ensuring optimal performance and longevity of your Greystone appliance․
Greystone 17 & 21 Gas Ranges
The Greystone 17 and 21 gas ranges are designed to be robust and versatile additions to any RV kitchen․ These models are built to last, fitting seamlessly into various kitchen configurations; A key feature is their high-output 8,000 BTU burners, providing ample cooking power for diverse culinary needs while traveling․
These ranges offer a balance of performance and practicality, making them ideal for RV enthusiasts․ Proper maintenance, as outlined in the full manual, will ensure years of reliable service from these dependable appliances․
Greystone Over-the-Range Oven (950 Watts, 30×16)
The Greystone Over-the-Range Oven, boasting 950 watts and dimensions of 30×16 inches, is a space-saving solution for RV kitchens․ Its convenient twist-on design allows for tool-free installation and provides hassle-free protection․ This oven offers a practical cooking option without sacrificing valuable counter space․
This model is designed for ease of use and efficient performance․ Refer to the complete manual for detailed operating instructions, safety precautions, and cleaning guidelines to maximize its lifespan and ensure safe operation during your travels․
Understanding BTU Output
BTU (British Thermal Unit) measures the amount of heat a burner produces․ Higher BTU ratings signify more powerful burners, leading to faster heating and cooking times․ Greystone ranges, like the 17 and 21 models, feature high-octane 8,000 BTU burners, providing spacious and efficient cooking capabilities․
Understanding BTU output helps you select the appropriate burner setting for different cooking needs․ Higher BTU settings are ideal for boiling or searing, while lower settings are suitable for simmering․ Proper BTU management ensures optimal cooking results and propane efficiency․
Propane Regulator Information
Your Greystone RV stove relies on a propane regulator to maintain consistent gas pressure, ensuring safe and efficient operation․ A regulator, like the Deking Propane Model 6050, automatically adjusts propane flow, preventing overpressure and ensuring stable burner flames․
Regularly inspect the regulator and propane lines for leaks or damage․ If you suspect a leak, immediately shut off the propane supply and contact a qualified technician․ Proper regulator function is crucial for safe cooking and preventing potential hazards within your RV kitchen environment․
Furrion Vision S Integration (if applicable)
Certain Greystone RV models may integrate with the Furrion Vision S system, offering enhanced monitoring capabilities․ The Furrion Vision S, utilizing a 4․3” monitor (Model FOS43TADS, F0S43TASF), can potentially display stove status or alerts, depending on the specific RV configuration․
This integration allows for remote observation of the cooking area, enhancing safety and convenience․ Refer to your RV’s Furrion Vision S manual for detailed instructions on accessing and interpreting any stove-related information displayed on the system․ Compatibility varies by model․
Warranty Information
Greystone RV stoves are warranted against defects in materials and workmanship for a specified period from the date of original purchase․ The warranty duration varies depending on the specific model and component․ This warranty covers repair or replacement of defective parts, at Greystone’s discretion․

To initiate a warranty claim, retain your proof of purchase and contact Greystone Support (see section below)․ The warranty does not cover damage resulting from misuse, improper installation, or failure to follow operating instructions; Review your specific product documentation for complete warranty details․
Contacting Greystone Support
For assistance with your Greystone RV stove, including troubleshooting, parts inquiries (like GR26GR, 2022302064, or 2022302068), or warranty claims, reach out to Greystone’s dedicated support team․ While specific contact details aren’t readily available online, checking with your RV dealer or the retailer where you purchased the stove is a good first step․

Alternatively, explore online RV forums and communities where other Greystone stove owners may share solutions or contact information․ Detailed product manuals often include support contact details as well, so review those resources carefully․
Avoiding Damage: Do’s and Don’ts
To preserve your Greystone RV stove’s longevity, adhere to these guidelines․ Do use non-abrasive cleaning pads for the cooktop and burner grates․ Do ensure burners are clear of obstructions․ Don’t employ harsh chemicals like oven cleaners, bleach, steel wool, or rust removers – these will cause irreparable damage․
Avoid forceful impacts to the glass cover (if applicable)․ Regularly inspect the propane regulator and connections for leaks․ Proper care ensures safe and efficient operation, preventing costly repairs and maintaining your stove’s performance for years to come․
Prohibited Cleaning Agents
Protect your Greystone RV stove’s surfaces by strictly avoiding certain cleaning agents․ Never use oven cleaners, as their harsh chemicals can permanently etch and discolor the cooktop and oven interior․ Bleach is equally damaging, causing corrosion and potentially releasing harmful fumes․ Similarly, steer clear of steel wool and rust removers; these are abrasive and will scratch surfaces․
Abrasive cleaners, scouring powders, and any product containing strong acids or alkalis are also prohibited․ Opt for mild dish soap and warm water for routine cleaning, ensuring a gentle yet effective approach to maintain your stove’s pristine condition․
Preventing Obstructions
Maintaining clear pathways for proper ventilation is crucial for safe and efficient operation of your Greystone RV stove․ Do not allow any items to obstruct the burner ports, as this can lead to uneven flames or burner failure․ Ensure the oven vents are always free from blockage to facilitate proper heat circulation and prevent carbon monoxide buildup․
Avoid placing flammable materials near the stove, and regularly inspect the area around the appliance for any accumulated debris․ Keeping the stove clear of obstructions ensures optimal performance and minimizes potential safety hazards during cooking․
Installation Guidelines (General)
Proper installation is vital for the safe and efficient operation of your Greystone RV stove․ Ensure the RV is on a level surface before beginning․ Verify adequate ventilation around the appliance, adhering to all local and RV park regulations․ Connect the propane supply using approved fittings and regularly check for leaks․
Some models, like the over-the-range oven, feature easy, tool-free twist-on installation․ Always consult a qualified technician if you are unsure about any aspect of the installation process․ Incorrect installation can void the warranty and create a safety hazard․