
Understanding Smoke Detector Wiring Diagrams
Navigating a smoke detector wiring diagram PDF requires understanding symbols, color codes, and configurations for safe and effective installation or troubleshooting.

Types of Smoke Detectors
Understanding the diverse range of smoke detectors is crucial before diving into any wiring diagram PDF. Primarily, detectors fall into two categories: ionization and photoelectric. Ionization detectors are generally more responsive to fast-flaming fires, while photoelectric types excel at detecting smoldering fires.
Furthermore, there are combination detectors offering both technologies for comprehensive protection. Specialized detectors, like those for duct systems, also exist, requiring unique wiring approaches detailed in their specific PDFs. Knowing your detector type is the first step to correctly interpreting its wiring diagram and ensuring optimal safety.
Hardwired vs. Battery-Powered Detectors
A key distinction when reviewing a smoke detector wiring diagram PDF lies in whether the detector is hardwired or battery-powered. Hardwired detectors connect directly to your home’s electrical system, often interconnected for whole-house alerts, and typically include a battery backup. Wiring diagrams for these are more complex, showing connections to the power source and interconnecting wires.
Battery-powered detectors are simpler to install, requiring no electrical wiring, but rely solely on battery power. Their diagrams are straightforward, focusing on battery placement. Understanding this difference is vital for correctly interpreting the PDF and performing safe installation or troubleshooting.
Components of a Smoke Detector Circuit
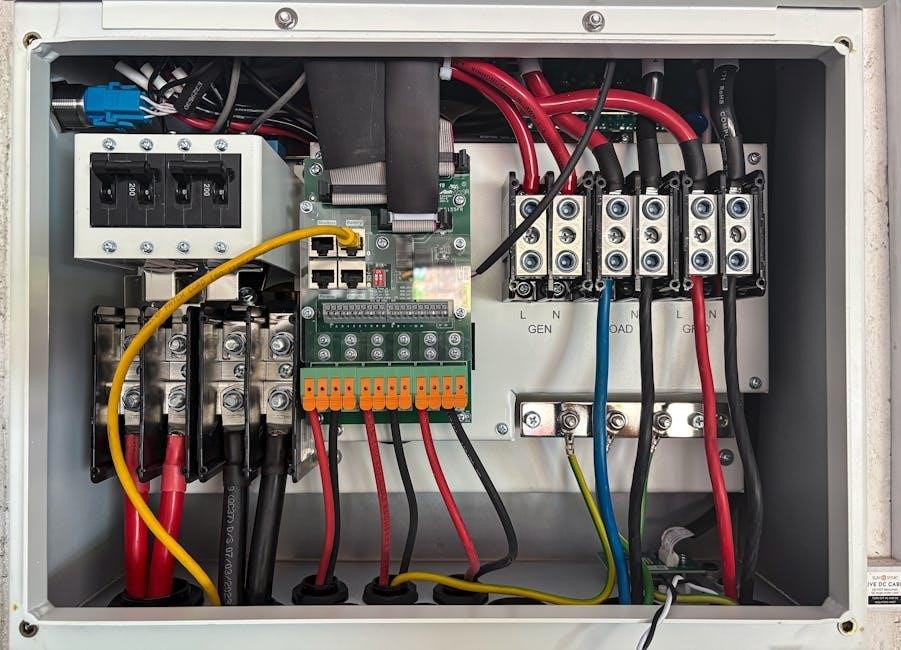
Analyzing a smoke detector wiring diagram PDF reveals core components like the power source (battery or mains), the sensing chamber (detecting smoke particles), the amplifier (boosting the signal), and the alarm (sounder). Resistors, transistors, and integrated circuits form the electronic heart, often detailed in schematic views within the PDF.
Interconnected systems showcase additional wiring for communication between detectors. Identifying these components and their connections is crucial for understanding the circuit’s function and accurately interpreting the diagram for installation or repair purposes.

Decoding a Smoke Detector Wiring Diagram PDF
Successfully interpreting a smoke detector wiring diagram PDF hinges on recognizing symbols, understanding color coding, and grasping common wiring layouts for proper installation.
Identifying Key Symbols
Decoding a smoke detector wiring diagram PDF begins with recognizing essential symbols. A circle often represents the detector itself, while straight lines signify wiring pathways. Look for symbols denoting power sources (AC or DC), typically represented with wavy or straight lines, respectively. A ground connection is usually indicated by three descending lines or an upside-down triangle. Interconnection lines, crucial for linked detectors, are often dashed or dotted. Understanding these visual cues is paramount; a square might represent a junction box, and specific shapes denote different types of switches or relays within the system. Familiarizing yourself with these standardized symbols ensures accurate interpretation of the diagram and safe wiring practices.
Understanding Color Coding
A smoke detector wiring diagram PDF relies heavily on consistent color coding for safe installation. Typically, black wires indicate “hot” or live power, while white wires represent the neutral connection. Green or bare copper wires are universally used for grounding. Red wires often signify interconnected detector communication. However, variations exist, so always verify the specific diagram’s legend. Ignoring color codes can lead to short circuits or fire hazards. Some diagrams may also utilize blue or yellow wires for specific functions, like auxiliary power or remote signaling. Accurate color identification is crucial before making any connections, ensuring a secure and functional system.
Common Wiring Configurations
A smoke detector wiring diagram PDF frequently illustrates several standard configurations. A typical setup involves a single detector directly powered from a 120V AC circuit. Interconnected systems, however, link multiple detectors, so a triggered alarm activates all units. These use a shared communication wire, often red. Zone wiring divides a building into areas, allowing pinpoint alarm location. Wireless systems, though less common in diagrams, show battery power and radio frequency communication. Understanding these layouts, as depicted in the PDF, is vital for correct installation and ensuring comprehensive fire protection throughout the property.

Step-by-Step Wiring Instructions
Referencing a smoke detector wiring diagram PDF is crucial; carefully follow each step for connecting wires, securing the device, and testing functionality.
Wiring a Single Smoke Detector
Before starting, consult your smoke detector wiring diagram PDF to identify the correct wiring scheme for your specific model. Typically, a single detector requires a neutral wire (usually white), a hot wire (usually black), and potentially a red wire for power supply.
After disconnecting power at the breaker, connect the wires according to the diagram, ensuring secure connections with wire connectors. Mount the detector securely to the ceiling or wall, following manufacturer instructions.
Restore power and test the detector by pressing the test button; a loud alarm confirms proper operation. If it fails, re-check all connections against the smoke detector wiring diagram PDF and ensure the power is fully restored.
Wiring Multiple Smoke Detectors (Interconnected)
Interconnected systems rely heavily on a detailed smoke detector wiring diagram PDF. These systems ensure that if one detector senses smoke, all detectors sound the alarm. Typically, interconnected detectors share a common three-wire (or sometimes four-wire) communication line alongside the standard power wires.
Carefully follow the diagram to connect each detector to the shared communication line, ensuring correct polarity. Proper sequencing is crucial; often, detectors are daisy-chained. After wiring, restore power and test the system by activating one detector – all should alarm.
Refer to the smoke detector wiring diagram PDF if any detector fails to respond, verifying all connections and the communication line’s integrity.
Wiring with Existing Systems
Integrating new detectors into an existing system demands a careful review of the smoke detector wiring diagram PDF. Identify the existing wiring configuration – is it hardwired or battery-powered, and how are the detectors interconnected? Match the new detector’s wiring scheme to the existing one, paying close attention to wire colors and terminal designations.
If adding to an interconnected system, extend the communication wires to the new detector, ensuring secure connections. Always power down the system before making any connections. After wiring, thoroughly test the entire system to confirm proper functionality and communication between all detectors.
The smoke detector wiring diagram PDF is essential for avoiding compatibility issues.

Troubleshooting Common Wiring Issues
Utilizing a smoke detector wiring diagram PDF aids in diagnosing power failures, false alarms, or interconnection problems by visually tracing circuit paths.
Detector Doesn’t Power On
If your smoke detector lacks power, consult the wiring diagram PDF to verify the power source connection – whether hardwired or battery-operated. First, ensure the circuit breaker hasn’t tripped for hardwired units, and test the breaker itself. Next, confirm correct battery installation with proper polarity if battery-powered.
Carefully examine the wiring diagram PDF for loose connections at the detector, wiring splices, or the power source. Use a multimeter to test voltage at the detector terminals, comparing readings to the diagram’s specifications. A damaged wire or faulty connection indicated on the PDF could be the culprit, requiring repair or replacement.
False Alarm Issues
Frequent false alarms necessitate reviewing the smoke detector’s wiring diagram PDF to rule out wiring-related causes. Inspect for shared neutral wires with other devices, potentially introducing electrical noise. Check the diagram for proper interconnection wiring if multiple detectors are linked, ensuring correct configurations.
Environmental factors, not wiring, can also trigger alarms; however, the PDF might indicate sensitivity settings. Verify the detector isn’t near steam, cooking fumes, or high-humidity areas. A faulty detector itself is possible, but confirm wiring integrity first using the diagram as a guide. Proper wiring minimizes interference.
Interconnection Problems
When interconnected smoke detectors fail to communicate, consult the wiring diagram PDF. Verify all detectors are wired to the same circuit, following the diagram’s specified wiring scheme. Inspect wire connections at each detector and the control panel, ensuring secure and correct placement. Loose connections or incorrect wiring are common culprits.
The PDF will illustrate the proper method for linking detectors – typically using a dedicated interconnection wire. Confirm the voltage is consistent across all devices. A break in the interconnection wire will disable the system. Carefully trace the wire’s path using the diagram.
Safety Precautions When Wiring
Always disconnect power before working with wiring, utilize insulated tools, and adhere to local electrical codes for a safe installation process.
Turning Off Power
Before commencing any work on smoke detector wiring, absolutely prioritize safety by completely disconnecting the power supply. Locate the circuit breaker controlling the smoke detector’s circuit within your electrical panel. Flip the breaker to the “OFF” position; double-check with a non-contact voltage tester to confirm power is indeed off at the detector location.
Never assume the breaker is correctly labeled – always test! This crucial step prevents electrical shock and potential damage to the detector or your home’s electrical system. If unsure about identifying the correct breaker, consult a qualified electrician. Proper power disconnection is paramount for a safe and successful installation or repair.
Using Proper Tools
Successful smoke detector wiring demands the right tools for the job, ensuring both safety and efficiency. Essential items include insulated screwdrivers (to prevent shorts), wire strippers, pliers, a voltage tester (to confirm power is off), and potentially a multimeter for advanced troubleshooting. Always inspect tools for damage before use; frayed wires or cracked handles pose risks.
Employing appropriate tools minimizes the chance of damaging wires or the detector itself. Avoid using makeshift tools, as they can lead to inaccurate work and potential hazards. A well-equipped toolkit demonstrates a commitment to a professional and secure installation or repair process.
Local Electrical Codes
Adherence to local electrical codes is paramount when working with smoke detector wiring, overriding any generalized diagram. Regulations vary significantly by region, dictating requirements for detector placement, interconnection methods, and wiring types. Consult your local building department or a qualified electrician to ascertain specific code requirements before commencing any work.
Ignoring these codes can lead to failed inspections, safety hazards, and potential legal ramifications. Codes often specify the need for arc-fault circuit interrupters (AFCIs) or ground fault circuit interrupters (GFCIs) in smoke detector circuits. Always prioritize code compliance for a safe and legally sound installation.

Resources for Smoke Detector Wiring Diagrams
Numerous online resources, including manufacturer websites and electrical forums, offer downloadable smoke detector wiring diagram PDFs for various models.
Manufacturer Websites
Directly accessing the manufacturer’s website is often the most reliable source for accurate smoke detector wiring diagram PDFs. Companies like Kidde, First Alert, and Nest consistently provide detailed documentation for their products. These diagrams typically include specific instructions tailored to each model, ensuring compatibility and safety.
Searching the support or downloads section of these websites usually yields the necessary PDFs. You may need the model number of your smoke detector to locate the correct diagram. These resources often feature interactive wiring guides and troubleshooting tips, supplementing the static PDF format. Prioritizing manufacturer resources minimizes the risk of using outdated or incorrect information;
Online Electrical Forums
Dedicated online electrical forums can be valuable resources for locating smoke detector wiring diagram PDFs and receiving expert advice. Platforms like ElectricianTalk and DIY Home Improvement forums often host threads discussing specific models and wiring challenges. Experienced electricians and DIY enthusiasts frequently share diagrams and offer guidance.
However, exercise caution when relying on forum-sourced information. Always verify the accuracy of any diagram before implementing it, as user-submitted content may not always be correct. Cross-reference with manufacturer documentation whenever possible. These forums are best used for clarifying specific issues or finding solutions not readily available elsewhere.
PDF Download Locations
Numerous websites archive smoke detector wiring diagram PDFs, though reliability varies. ManualsLib and similar document repositories often contain a wide range of models. Searching directly on Google using specific keywords like “[detector brand] wiring diagram PDF” can yield results from manufacturer websites or authorized distributors.
Beware of unofficial sites offering downloads, as they may contain outdated or inaccurate information, or even malware. Prioritize manufacturer websites for the most accurate and up-to-date diagrams. Always scan downloaded files with antivirus software before opening them to ensure safety and data protection.
DIY vs. Professional Installation
Interpreting a smoke detector wiring diagram PDF empowers DIYers, but complex systems or uncertainty necessitate a qualified electrician for safe, code-compliant installation.
When to Call an Electrician
Decoding a smoke detector wiring diagram PDF can seem straightforward, but certain situations demand professional expertise. If the diagram appears overly complex, or if you’re uncomfortable working with electrical wiring, immediately contact a licensed electrician.
Specifically, always consult a professional when dealing with hardwired systems, especially if your home has older wiring. Incorrect wiring can create fire hazards or render the detectors ineffective. Furthermore, if you encounter issues understanding local electrical codes related to smoke detector installation, an electrician ensures compliance.
Don’t hesitate to seek professional help if you’re unsure about any aspect of the wiring process – safety is paramount. A qualified electrician will guarantee a secure and functioning smoke detection system.

Cost Comparison
Analyzing a smoke detector wiring diagram PDF helps estimate project costs. DIY installation, utilizing the diagram, primarily incurs the cost of detectors – ranging from $20 to $100+ per unit, depending on features. However, factor in tool costs if you lack essentials like wire strippers or testers.
Professional installation adds labor costs, typically between $75 to $200 per detector, varying by location and complexity. While seemingly higher upfront, a professional ensures correct wiring, potentially avoiding costly future repairs or safety hazards.
Considering long-term safety and peace of mind, professional installation often proves a worthwhile investment, despite the increased initial expense.

Advanced Smoke Detector Systems
Interpreting a smoke detector wiring diagram PDF is crucial for installing smart detectors and whole-house systems, enabling remote monitoring and control features.
Smart Smoke Detectors
Understanding the smoke detector wiring diagram PDF is paramount when integrating smart detectors into your home network. These advanced systems often require specific wiring configurations for power, interconnection, and data transmission – typically utilizing existing wiring or necessitating new runs. The PDF will detail how to connect the detector to your Wi-Fi network, outlining any necessary hub or gateway requirements.
Pay close attention to the diagram’s depiction of power sources, as smart detectors may operate on battery, hardwired AC, or a combination. Correctly identifying the wiring for notification features, like smartphone alerts, is also vital. A clear understanding of the diagram ensures seamless integration and reliable performance of your smart smoke detection system.
Whole-House Systems
Interpreting the smoke detector wiring diagram PDF is crucial for installing interconnected, whole-house systems. These systems link all detectors, so activation of one triggers all alarms, enhancing safety. The PDF illustrates the wiring scheme – often utilizing a common communication wire alongside the power supply – to ensure seamless interconnection.
Carefully examine the diagram for details on the main control panel or system hub, if applicable, and its connection points. Understanding the wiring for auxiliary devices, like remote alarm panels or notification systems, is also essential. Accurate wiring, guided by the PDF, guarantees the entire system functions cohesively during an emergency.