Reading crochet patterns is an essential skill for every crafter. Mastering abbreviations, symbols, and understanding pattern structure can help you create beautiful projects. This guide will walk you through the basics of interpreting crochet patterns, from understanding stitch repeats to deciphering diagrams, ensuring your projects turn out perfectly every time.
1.1 Importance of Understanding Crochet Patterns
Understanding crochet patterns is crucial for achieving accurate and professional results. It helps avoid errors, saves time, and ensures projects fit as intended. Clear comprehension of abbreviations, symbols, and instructions allows crocheters to tackle complex designs confidently. Patterns provide a roadmap, and mastering their language opens up endless creative possibilities. Whether you’re a beginner or an experienced crafter, grasping pattern basics ensures successful outcomes and enhances your overall crochet journey.
1.2 Brief Overview of Crochet Pattern Structure
A crochet pattern typically begins with essential details like the project’s title, designer, and skill level. It then outlines materials, tools, and gauge information, followed by a list of abbreviations and terms. The pattern is divided into clear sections, such as preparation, body, sleeves, or other components. Instructions are presented in a logical sequence, often including stitch counts, shaping details, and special techniques. Diagrams or charts may accompany written instructions to clarify complex stitches or construction methods, ensuring a clear and organized guide for crafters of all levels.
Understanding the Structure of a Crochet Pattern
A crochet pattern is organized into sections: header info, materials, gauge, abbreviations, and instructions. Each part guides you through the project, ensuring clarity and ease.
2.1 Header Information: Title, Designer, and Skills Level
The header of a crochet pattern typically includes the project’s title, designer’s name, and skill level. This section helps crocheters identify the project’s complexity and suitability. The skill level—beginner, intermediate, or advanced—guides crafters in selecting projects that match their expertise. Sometimes, the header also lists materials or tools needed, providing a quick overview. Understanding this section ensures you choose patterns that align with your skills and prepares you with the necessary supplies before starting your project.
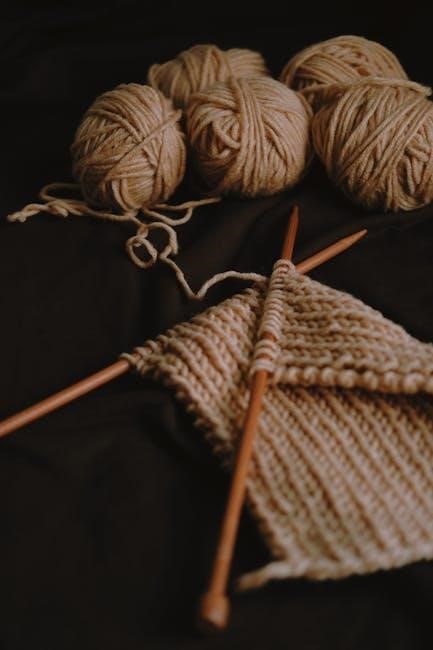
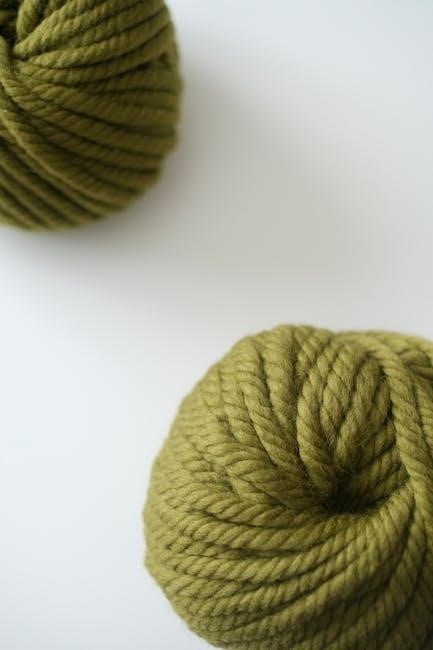
2.2 Materials and Tools Required
The materials section of a crochet pattern lists the essential supplies needed, such as yarn type, weight, and color, as well as the recommended hook size. It may also specify additional tools like scissors, stitch markers, or tapestry needles. Understanding this section ensures you have everything prepared before starting. Yarn weight and hook size are critical for achieving the correct gauge, which impacts the project’s fit and appearance. Some patterns may even suggest specific yarn brands or fibers for best results.
2.3 Gauge and Measurements
Gauge, or tension, is a critical factor in crochet patterns. It measures how tightly or loosely stitches are worked, ensuring the finished project fits as intended. Patterns typically provide gauge information, such as stitches per inch or centimeter, using a specific hook and yarn. Accurate gauge ensures proper sizing and drape. To check gauge, crochet a swatch using the recommended hook and yarn, then measure with a ruler or tapestry needle. Adjusting hook size or yarn weight can help match the required gauge for a professional finish.
Key Components of Crochet Patterns
Crochet patterns include abbreviations, symbols, and terms to streamline instructions. Stitch counts and shaping instructions guide the structure, ensuring proper form and symmetry in your project.
3.1 Abbreviations and Terms
Abbreviations and terms are fundamental in crochet patterns, saving space and streamlining instructions. Common abbreviations include ch (chain), sc (single crochet), dc (double crochet), and sl st (slip stitch). Terms like BLO (back loops only) and FLO (front loops only) guide stitch placement. Understanding these shorthand notations is crucial for accurate project execution. Patterns often include a key or abbreviation list at the beginning, ensuring clarity. Familiarizing yourself with these terms and symbols will enhance your ability to follow patterns confidently and achieve professional results in your crochet projects.
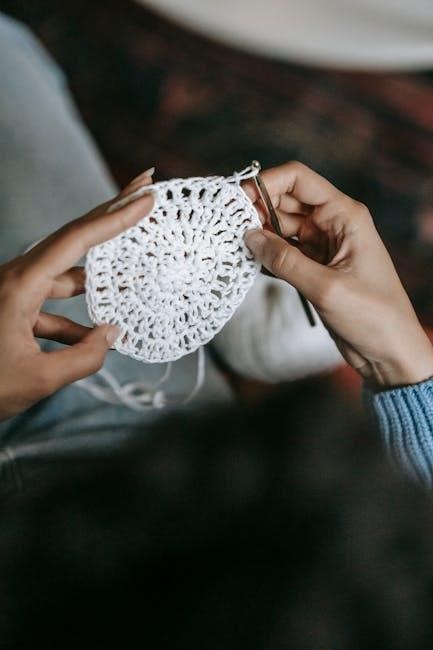
3.2 Symbols and Stitch Diagrams
Symbols and stitch diagrams are visual tools that complement written instructions, making complex patterns easier to follow. Each symbol represents a specific stitch, such as a circle for a slip stitch or an “X” for a double crochet. Diagrams illustrate stitch sequences, rounds, and project shapes, helping crocheters understand the pattern’s flow. Learning to interpret these symbols and charts is essential for accuracy, especially in intricate designs. By following the symbols step-by-step, you can navigate the pattern confidently, ensuring your project aligns with the intended design. This visual approach simplifies stitching and enhances creativity.
3.3 Stitch Counts and Shaping Instructions
Stitch counts are crucial for maintaining the integrity of your crochet project, ensuring symmetry and proper fit. Patterns often include specific numbers to guide you, especially after increases or decreases. Shaping instructions, such as those for sleeves or necklines, are typically marked with clear indicators. Pay attention to phrases like “increase” or “decrease” and their corresponding abbreviations. Properly following these instructions ensures your project develops the desired form. Always double-check your stitch count after shaping to maintain consistency and achieve the intended design.
Reading Written Instructions
Reading written instructions requires understanding abbreviations, following stitch repeats, and working in rows or rounds. Pay attention to terms like “turn” and “chain” for clarity.
4.1 Understanding Stitch Repeats and Brackets
Stitch repeats are crucial in crochet patterns, often enclosed in brackets or parentheses. These indicate a sequence of stitches to be repeated across a row or round. For example, “(sc, dc) in each st across” means to crochet a single crochet and double crochet in every stitch. Brackets help clarify complex instructions, ensuring stitches are executed correctly. Always count your stitches to maintain pattern consistency. Understanding repeats and brackets is key to achieving the desired texture and shape in your crochet projects.
4.2 Working in Rows vs. Rounds
Working in rows typically involves crocheting back and forth in straight lines, often used for flat projects like scarves or blankets. Each row begins with a turning chain and ends with a stitch to complete the row. Working in rounds, however, involves crocheting in a continuous circle, common for projects like hats or amigurumi toys. Rounds usually start with a slip stitch or chain to join the circle and continue without turning. Understanding the difference is vital for maintaining the correct shape and structure of your crochet project.
4.3 Special Instructions: Turning Chains and Skipping Stitches
Turning chains are used to complete a row and prepare for the next one. They are typically not counted as stitches and are worked at the end of a row. Skipping stitches is often indicated in patterns to create space or shape, such as “sk st” or “skip next stitch.” Patterns may specify when to skip stitches, and it’s crucial to follow these instructions to maintain the design. Always double-check turning chains and skipped stitches to ensure proper alignment and stitch count, as errors here can affect the overall shape of your project.
Interpreting Crochet Diagrams
Interpreting crochet diagrams involves understanding stitch symbols and their sequences. Each symbol represents a specific stitch, and following the chart step-by-step ensures accurate pattern execution.
5.1 Identifying Stitch Symbols and Charts
Identifying stitch symbols and charts is crucial for understanding crochet diagrams. Each symbol represents a specific stitch, such as single crochet (sc) or double crochet (dc). Patterns often include a key or legend at the beginning, explaining each symbol. Charts are visual representations of the pattern, showing stitches in rows or rounds. By locating the starting point and following the sequence of symbols, you can accurately interpret the design. This step is essential for translating diagrams into tangible, well-crafted projects.
5.2 Following Diagrams for Complex Patterns
Following diagrams for complex patterns requires attention to detail and understanding of visual cues. Diagrams use symbols, grids, and arrows to guide stitch placement and sequence. Start by identifying the starting point, often marked with a circle or arrow. Follow the flow of symbols, working row by row or round by round. Break complex patterns into smaller sections and use a highlighter to track progress. Always refer to the key for symbol meanings. Patience and careful observation are key to mastering intricate designs and ensuring accuracy in your crochet work.
Understanding Special Instructions
Special instructions in crochet patterns guide techniques like increases, decreases, shaping, and joining. These steps are crucial for achieving the desired form and professional finish in projects.
6.1 Increases, Decreases, and Shaping
Increase and decrease stitches are essential for shaping crochet projects. Increases, like double crochet two together (dc2tog), add stitches, while decreases, such as slip stitch two together (sl2tog), reduce them. Shaping techniques, including back loop only (BLO) or front post stitches, help create curves or textures. Properly following these instructions ensures a well-fitted garment or accessory. Always count stitches after increases or decreases to maintain pattern integrity and achieve the desired shape. These techniques are fundamental for creating tailored, professional-looking crochet designs.
6.2 Joining and Fastening Off
Joining and fastening off are crucial steps in completing a crochet project. Joining methods, such as the slip stitch or whipstitch, connect separate pieces seamlessly; Fastening off involves securing the last loop to prevent unraveling. Properly weaving in ends ensures a neat finish. Pay attention to pattern instructions for specific joining techniques, as some require matching stitches or aligning seams. Tips for smooth joins include maintaining even tension and counting stitches before joining to ensure accuracy. These steps ensure a polished and professional-looking final product.
Troubleshooting Common Issues
Troubleshooting common issues in crochet patterns involves identifying errors and correcting them. Check for miscounted stitches, misread instructions, or incorrect symbol interpretations. Adjustments may be needed to ensure proper fit and appearance.
7.1 Identifying Errors in Stitch Count
Identifying errors in stitch count is crucial for ensuring your crochet project fits correctly. Common signs of stitch count mistakes include uneven fabric, mismatched seams, or stitches not adding up as expected. To detect errors, recount your stitches regularly, especially after complex repeats or shaping. Use stitch markers to track your progress and verify stitch counts at the end of each row or round. Correcting stitch count early prevents major issues later and ensures your project turns out as intended.
7.2 Adjusting Gauge for Correct Fit
Adjusting gauge is vital to ensure your crochet project fits correctly. Gauge refers to the number of stitches and rows per inch, and deviations can affect the overall size. If your gauge is too tight, switch to a larger hook; if too loose, use a smaller one. Always check gauge early in your project to avoid resizing issues later. Proper gauge adjustment ensures a professional finish and prevents the project from being too tight or too loose. Regularly measuring your gauge helps maintain consistency and accuracy.
Practical Tips for Working with Patterns
Use highlighters to mark abbreviations and key instructions. Keep a tally of completed rows and stitches to stay organized. This helps maintain progress and accuracy effortlessly.
8.1 Highlighting and Marking Patterns
Highlighting and marking patterns is a great way to stay organized; Use highlighters to emphasize abbreviations, stitch repeats, and important notes. Mark your place with a sticky note or magnetic marker to track progress. For complex patterns, color-code sections like increases or decreases. This visual system helps prevent mistakes and ensures you follow instructions accurately. Additionally, circle or underline key terms like gauge or skills level to reference quickly. These simple techniques make navigating patterns less overwhelming and more enjoyable for crocheters of all skill levels.
8.2 Keeping Track of Progress
Keeping track of progress is crucial for completing crochet projects successfully. Use a row counter or checklist to mark completed stitches and rows. Take periodic photos of your work to visually track improvements. Note modifications or adjustments made to the pattern. Maintain a project journal to record yarn usage, hook size, and time spent. This organized approach helps stay motivated, ensures accuracy, and provides a satisfying record of your creative journey from start to finish.